
How to prepare groom for photos: a sharp guide
- May 19
- 8 min read

TL;DR:
Most grooms overlook the importance of preparing for photos, which affects their comfort and posture. Beginning suit fittings 8 to 12 weeks in advance and practicing relaxed breathing techniques can enhance photo quality and confidence. Creating a tidy environment and engaging naturally during shoots produce authentic, polished images that truly capture the groom’s personality.
Most grooms spend months planning a wedding and approximately zero hours thinking about how to actually prepare for the photos. That’s a problem. Knowing how to prepare groom for photos goes far beyond putting on a suit. It involves timing, grooming, environment, posture, and the confidence to let your photographer capture you at your best. This guide walks you through everything, from suit tailoring timelines to day-of breathing techniques, so you walk into that photo session looking polished and feeling like yourself.
Table of Contents
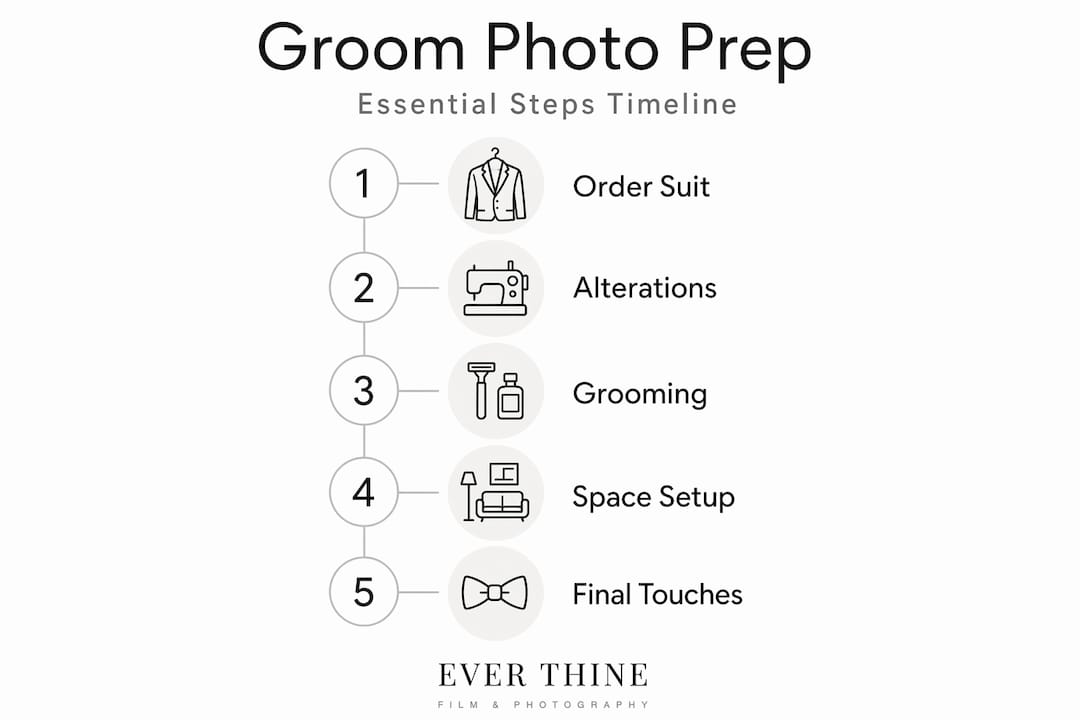
Key takeaways
Point | Details |
Start suit prep early | Order and tailor your suit 8 to 12 weeks before the wedding to allow time for fittings. |
Grooming follows a timeline | Schedule your final haircut 5 to 7 days before the wedding so your style settles without looking overgrown. |
Environment shapes photos | A tidy, uncluttered room with natural light makes a dramatic difference to photo quality. |
Breathing beats posing | A deep breath before each shot relaxes your posture and removes the stiffness that ruins otherwise great frames. |
Stage your accessories | Lay out cufflinks, shoes, and your boutonnière before the photographer arrives so no detail shot gets missed. |
How to prepare groom for photos: start months ahead
The single biggest mistake grooms make is treating photo preparation as a morning-of task. The truth is that the most important decisions happen weeks, even months, in advance. Getting these right gives you an unshakeable foundation on the day itself.
Suit ordering and fit
Begin suit preparation 8 to 12 weeks before the wedding. This allows enough time for ordering, alterations, and a final fitting without panic. Off-the-rack suits rarely fit perfectly, and a poorly fitted suit photographs badly regardless of how expensive it was.
When it comes to fit, the shoulders are everything. The shoulder seam must sit precisely at the edge of your shoulder, not drooping down your arm or pulling tight across the back. The jacket should button without any tension across the chest. A suit that fits your silhouette enhances your posture and creates clean lines in every frame. Suit brand matters far less than suit fit when the camera is involved.
For colour and fabric, lean towards classic tones. Navy, charcoal, and deep grey all photograph exceptionally well across a range of lighting conditions. Very pale or very bright colours can cause exposure issues for photographers. Avoid heavily textured fabrics if you want clean, crisp lines in close-up shots.
Pre-wedding preparation checklist
Task | When to complete it |
Order and tailor suit | 8 to 12 weeks before |
Start skincare routine | 6 weeks before |
Break in shoes | 2 to 3 weeks before |
Schedule final haircut | 5 to 7 days before |
Collect all accessories | 1 week before |
Confirm photo schedule | 3 to 5 days before |
Skincare: Begin a consistent routine at least six weeks before the wedding. This does not need to be complicated. A cleanser, moisturiser with SPF, and staying well-hydrated will visibly improve your skin’s texture and tone by the wedding day.
Shoes: Wear your wedding shoes around the house for at least two weeks beforehand. Stiff, unworn shoes affect your walk and your posture in full-length shots.
Accessories: Gather cufflinks, your watch, and any pocket square early. Boutonnières are typically collected the morning of, but every other accessory should be confirmed and set aside well in advance.
Haircut: A final haircut 5 to 7 days before the wedding strikes the right balance. Fresh enough to look sharp, settled enough to look natural rather than just-trimmed.
Day-of grooming for camera-ready results
Wedding morning moves fast. Knowing exactly what you need to do, and in what order, keeps you calm and looking sharp when the photographer arrives.
Plan to allow 30 to 60 minutes for grooming and getting dressed if you are doing it yourself. If you have a professional groomer or hair stylist helping you, budget 60 to 90 minutes. Most grooms underestimate this and end up rushing, which shows in the photos.
Skin: Wash your face with cool water on the morning. Apply a light moisturiser to avoid any dry patches or shine under photography lighting.
Beard or clean shave: If you wear a beard, tidy the edges two days before. Shaving the morning of is fine, but do it early to allow any redness to settle.
Nails: Clean, trimmed nails matter more than you think. Detail shots of rings, cufflinks, and hands are standard in groom photography, and ragged nails are impossible to ignore in close-ups.
Scent: Apply cologne early so it settles rather than sitting strong on the surface. Less is always more when you are sharing close spaces with your partner for portraits.
Hair: Stick with a style you have worn before and feel confident in. Wedding morning is not the moment to experiment. If you use product, apply it with a light hand and give it time to set before photographs begin.
Posture is something most grooms never think about until they see the photos. Stand tall, relax your shoulders downward rather than pulling them back rigidly, and keep your weight distributed evenly. These small adjustments make an enormous difference to how you carry yourself on camera.
Pro Tip: Before each photo, take one slow, deliberate breath in through your nose and release it before the shutter fires. This technique relaxes posture and shoulders naturally and eliminates the held-breath stiffness that ruins otherwise strong shots.

Setting up your space for quality photos
Where your photos are taken matters almost as much as how you look. A tidy, uncluttered room with good natural light gives your photographer the conditions to capture genuinely polished images. A cluttered, dimly lit hotel bathroom produces the opposite result regardless of how well-groomed you are.
Clear the getting-ready space one to two days before the wedding. Remove bags, garment covers, food packaging, and anything that does not belong in frame. Ask your best man or a groomsman to help you reset the room on the morning if things shift overnight.
Lighting and layout
Natural light is your photographer’s best tool. Position your getting-ready area near a window where possible. Avoid mixing light sources, such as leaving both the bathroom overhead light and a bedside lamp on simultaneously, as different colour temperatures create unflattering skin tones in photographs.
Environment factor | What to do |
Clutter | Clear the room 1 to 2 days before; appoint someone to maintain it on the day |
Lighting | Use natural window light; turn off artificial lighting where possible |
Accessories | Stage all details in one place before the photographer arrives |
Groomsmen | Brief them on timing so they are present for group shots without milling around |
Pro Tip: Lay out your suit, shoes, cufflinks, watch, and boutonnière on a clean, well-lit surface before the photographer walks in. Pre-staging your accessories means no scrambling, no missed detail shots, and a calmer morning for everyone.
Communicate with your best man and any groomsmen about when you need them in the room. Group shots require everyone present and reasonably composed, which is much easier to coordinate when expectations are set beforehand. A quick message the night before is usually all it takes.
Natural posing and confident on-camera presence
Posed photos can look stiff and forgettable. The frames that grooms always love most are the ones that capture real moments, real expressions, and genuine interaction. Your job during the photo session is not to perform. It is to be present, and let your photographer work around you.
Do something real. Buttoning your cufflinks, adjusting your tie, or pouring a small drink with your groomsmen are all natural, genuine actions that photograph beautifully because there is nothing forced about them.
Vary your framing. Ask your photographer about mixing full-length, half-body, and close-up shots. Different framings tell different parts of your story and prevent the album from feeling repetitive.
Talk to your photographer. A conversation mid-shoot produces better expressions than being asked to smile. Mention something funny, talk about the ceremony, or just chat. Genuine expressions come from genuine moments.
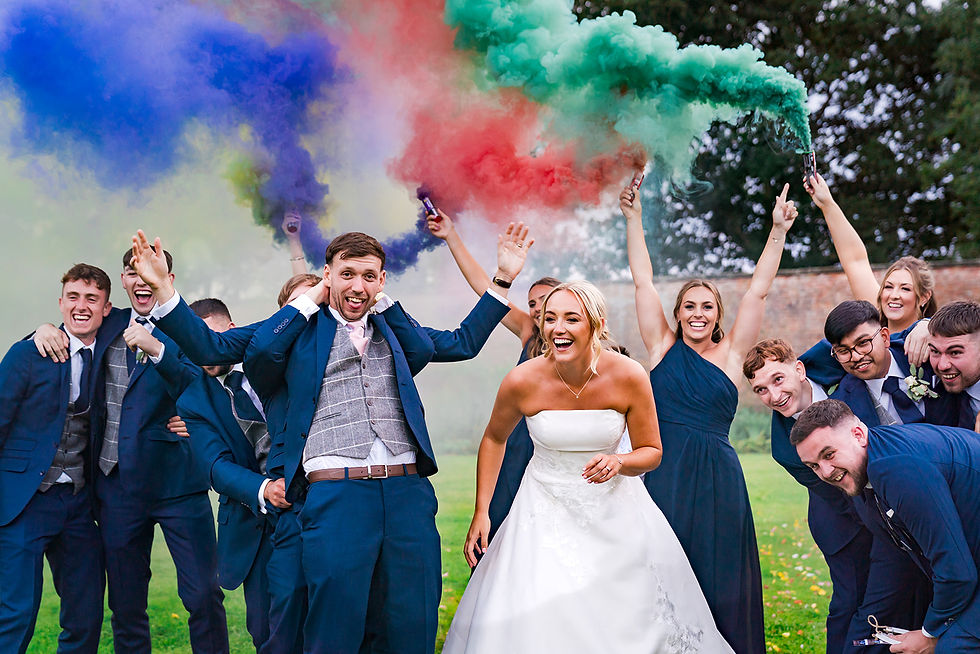
Engage with your groomsmen naturally. A handshake, a laugh, a shared toast: these interactions create dynamic, energetic group images rather than stiff line-ups that everyone forgets.
Avoid the common traps. Forced smiles, crossed arms, and holding your breath are the three most common groom photo mistakes. Be aware of them and you are already ahead of most.
The grooms who look best in their wedding photos are almost always the ones who stopped thinking about the camera entirely.
Pro Tip: Before you review a pose in your head, review your breathing first. A natural stance almost always follows a relaxed breath before shooting, and no amount of deliberate posing will replicate that ease.
For more detail on natural posing techniques that work for both grooms and couples, the Weddingfilmphotography blog covers this thoroughly.
What I have learned photographing grooms over the years
In my experience, the grooms who stress most about looking sharp are often the ones who appear most rigid in their photos. The ones who trust the process, show up prepared, and let themselves just be in the moment? Those are the images that genuinely stop you when you scroll through an album.
I have seen an expensive bespoke suit fail to save a groom who stood stiff and self-conscious throughout. I have also seen a well-fitted, mid-range suit look outstanding on a groom who was relaxed, breathing properly, and laughing with his friends. Confidence is not something a suit provides. It comes from being prepared, well-rested, and having done the groundwork weeks beforehand.
The detail that most grooms overlook is posture. Not standing straight in a military sense, but carrying themselves in a relaxed, natural way. Shoulders down, chin slightly forward, weight comfortable. It takes about thirty seconds to practise and it changes every single photograph.
The other lesson I would share is this: let go of the idea that photos require a performance. The authentic getting-ready moments that unfold when a groom is genuinely engaged with the morning, rather than posing through it, are always the most compelling. Your personality, your humour, your relationship with your groomsmen. That is what makes your photos yours.
— Ever
Get your groom photos covered professionally
[
Knowing how to prepare groom for photos is one part of the equation. Having a photographer who knows how to capture those moments without making you feel self-conscious is the other. At Weddingfilmphotography, we specialise in documentary-style coverage that puts grooms at ease and produces genuinely natural, polished results throughout the getting-ready session and beyond.
We work across Derbyshire weddings, Staffordshire, Worcestershire, and beyond, with tailored packages that cover both groom and bridal preparations in full. If you want photos you will actually be proud of rather than ones you quietly skip past, get in touch and let us talk through what your wedding morning could look like.
FAQ
When should a groom start preparing for wedding photos?
Start suit preparation 8 to 12 weeks before the wedding and begin a skincare routine at least six weeks out. Final grooming, such as your haircut, should happen 5 to 7 days before the big day.
What should a groom wear for photos?
Choose a well-fitted suit in a classic colour such as navy or charcoal, as these photograph well across most lighting conditions. Fit matters more than brand or price; the suit should sit cleanly at the shoulder and button without tension across the chest.
How long does groom photo preparation take on the wedding morning?
Allow 30 to 60 minutes if you are getting ready without a stylist, or 60 to 90 minutes if a professional groomer is involved. Building this time into your schedule prevents rushing, which directly affects how relaxed you appear in photos.
What are the best poses for a groom?
The best groom poses are grounded in real activities rather than staged positions. Adjusting cufflinks, sharing a drink with groomsmen, or having a genuine conversation all produce natural, engaging images that feel authentic rather than performative.
How do I look relaxed and natural in groom photos?
Take a slow breath before each shot to release tension in your shoulders and posture. Engage in conversation with your photographer rather than concentrating on the camera, and avoid holding your breath or forcing a smile, as both create visible stiffness in the final images.
Recommended

Comments