
Step by step wedding album: your complete guide

TL;DR:
Couples typically have between 400 and 800 wedding photos, which can be overwhelming to organize. An effective wedding album tells a story through curated, well-structured images, arranged chronologically and thoughtfully designed for visual flow. To create a timeless album, start early, ruthlessly cull photos, plan the layout, and review proofs carefully before printing.
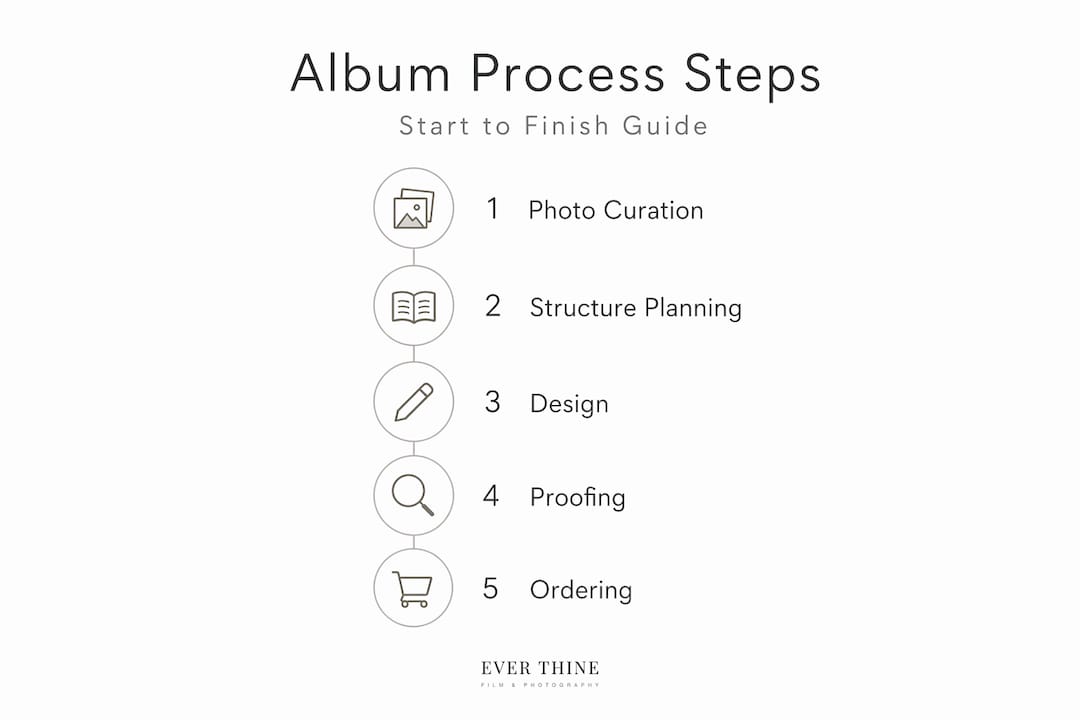
Most couples end up with somewhere between 400 and 800 wedding photos. That is a wonderful problem to have, but it quickly becomes paralysing when you sit down to create a step by step wedding album and realise you have no idea where to start. A wedding album, known in the print industry as a photo book or folio album, is far more than a pretty collection of images. It is the edited, physical story of your day. This guide walks you through every stage of the process, from gathering and culling your photos right through to approving your final proof, so you end up with something you will still be reaching for decades from now.
Table of Contents
Key takeaways
Point | Details |
Curation beats quantity | Aim for 60 to 120 photos across 20 to 40 pages for a narrative-driven album that holds attention. |
Chronological order tells the story | Organise images from getting ready through to the send-off so the album reads like a lived experience. |
Layout pacing matters as much as photos | Alternating full-page hero images with collages and white space enhances browsing enjoyment significantly. |
Proof before you print | Verify resolution, check for cropping issues, and order a proof copy if your printer offers one. |
Start early to avoid decision fatigue | Give yourself several weeks for curation and design so each choice feels considered, not rushed. |
Step by step: gathering and curating your photos
Before you design a single page, you need the right raw material. Gather every image from every source: your professional photographer’s delivery, your own phone camera roll, your parents’ phones, any disposable cameras from the tables, and guest uploads if you used a shared album app. Drop everything into one folder before you do anything else.
Next, create subfolders that mirror the shape of your day. A chronological structure works best, typically:
Getting ready (bride and groom separately)
Details (rings, flowers, stationery, shoes)
First look or pre-ceremony portraits
Ceremony (processional, vows, rings, kiss, recessional)
Family formals and group shots
Couple portraits (golden hour or post-ceremony)
Reception (entrance, speeches, first dance, cake cutting, guests on the floor)
Send-off
Once your folders are organised, cull ruthlessly. Delete any photo that is blurry, poorly lit, or simply a near-identical duplicate of the shot next to it. This is the step most couples skip, and it is the one that causes the most trouble later, because low-resolution or compressed images print with visible pixelation even when they look fine on a phone screen.
Your final selection should include a mix of:
Wide establishing shots that show venues and atmosphere
Close-ups of faces, hands, rings, and meaningful details
Candid moments between guests
Key ceremony and reception moments
Pro Tip: Aim for roughly 3 to 5 images per section of the day rather than front-loading your favourite moments. Spreading your best photos across the whole album keeps every page feeling special.
Planning your album structure and layout
This is the stage most people rush past, and it shows in the finished product. Before you open any design tool, sit down with a piece of paper and sketch out your page map. A well-planned page allocation prevents you running out of strong images two thirds of the way through, which leaves the reception feeling like an afterthought.
Choosing your format first
Your format decisions will shape every layout choice you make, so settle them before designing.
Format choice | Recommended option | Why it works |
Binding style | Lay-flat | Lay-flat binding allows full panoramic spreads without a gutter crease interrupting the image |
Paper finish | Lustre or matte | Both resist fingerprints better than gloss and reproduce skin tones beautifully |
Album size | 30 cm x 30 cm or larger | Larger formats show detail and give images room to breathe |
Mapping your story flow
Think of your album as a film. Each two-page spread should function as a mini story unit that makes sense on its own while also connecting to what comes before and after. Assign each key moment to a specific spread or set of pages. Your ceremony should probably occupy the most pages. Your getting ready section might warrant three or four pages rather than ten.
Pro Tip: Use sticky notes on a table or a simple spreadsheet to map spreads before you open your design software. Moving a sticky note is faster than moving a digital page layout.
Visual pacing is your secret tool here. Alternate between full-bleed hero images, multi-photo grids, and pages with generous white space. A natural emotional narrative builds from the quiet anticipation of getting ready, through the intensity of the ceremony, to the joy of the reception and finally the stillness of the send-off. Let that rhythm guide how dense or spacious each spread feels.
Designing the album: tools, layouts, and personal touches
Once your structure is planned, it is time to open a design tool. For most couples, Canva is the most approachable starting point. It offers photo book templates you can adapt, and its drag-and-drop interface requires no prior design experience. If you want more control over bleed, margins, and resolution, tools such as Momento or Artifact Uprising offer dedicated photo book platforms with professionally designed templates.
When choosing a template, think about your wedding’s visual style:
Modern and minimal: clean white backgrounds, one or two photos per spread, lots of breathing room
Classic and romantic: cream or ivory tones, small ornamental details, traditional serif fonts
Documentary and editorial: full-bleed images, bold layouts, very little text
Whichever style you choose, apply it consistently. Mixing three different font styles across 30 pages creates visual noise that distracts from the photos. Settle on one heading font and one body font, and use them throughout.
Captions are worth using sparingly. A short phrase beneath your first dance photo (“The moment the room went quiet”) adds warmth without cluttering the page. Longer blocks of text compete with the images for attention, and the images should always win.

Pro Tip: If you have a meaningful order of service, a handwritten note from a parent, or a scrap of ribbon from your bouquet, scan it and incorporate it as a page element. These tiny details make a folio album genuinely irreplaceable.
A note on preserving photos for print: always work with the highest resolution files your photographer delivered. JPEGs exported for web or social media are compressed and will not hold up at album size. Ask your photographer for full-resolution files if you are unsure what you received.
Finalising, proofing, and ordering
The review stage is where albums either become brilliant or quietly disappointing. Work through every single page with fresh eyes, ideally after a break of at least a day from the design work.
Check for:
Faces cropped at the forehead or chin by the page edge
Duplicate images appearing more than once in the album
Typos in any captions, dates, or names
Images that are obviously less sharp than those around them
Alignment issues where elements feel slightly off-centre
Verify your image resolution at 100% zoom before uploading for print. Most professional photo book services require a minimum of 300 DPI at the size the image will print. Anything below that will look soft on the page even if it looked crisp on your screen.
Once you upload, expect production and delivery to take between 5 and 10 business days, with printing typically taking 2 to 4 days before shipping time is added. If you are working towards a gift deadline or anniversary, build extra time into your schedule. Some services also offer expedited production for an additional fee.
Pro Tip: Order a single proof copy before committing to multiple albums. The difference between how something looks on a calibrated monitor and how it looks in your hands can be significant, particularly in terms of colour temperature and contrast.
If you find proofing overwhelming, the wedding album checklist from Weddingfilmphotography covers everything you should tick off before placing your order.
Common mistakes and how to avoid them
Most album regrets come down to a handful of avoidable errors. These are the ones that come up repeatedly.
“The albums that feel the most timeless are the ones where someone made hard choices. Editing is love. The couples who tried to include everything ended up with albums that felt like evidence rather than stories.”
Keeping that in mind, here is what to watch out for:
Overloading pages. Eight photos crammed into a single spread makes each one feel unimportant. Three photos with room to breathe makes all three feel considered.
Ignoring visual coherence across spreads. Images on the same spread should share a moment, a mood, or a location. Jumping from a portrait to a food shot to a candid in three adjacent frames creates whiplash.
Leaving proofreading until you are tired. Typos in your name, wrong dates, and cropped heads are all caught more easily on a fresh morning than at midnight after hours of designing.
Starting too late. Decision fatigue is real. When you are tired, you stop making good choices and start making quick ones. Give yourself at least three weeks from photo delivery to final order.
Skipping professional advice on materials. The difference between a lustre finish and a gloss finish, or between standard and lay-flat binding, is something you cannot fully appreciate until you hold both in your hands.
My honest take on the whole process
I have worked with a lot of couples over the years, and the ones who approach their album as an act of storytelling rather than photo sorting come away with something genuinely moving. It sounds like a small shift, but it changes every decision you make, from which image gets the full-page hero treatment to which candid makes the cut from a series of six very similar frames.
What surprises people most is how much the layout and pacing affect the experience of flipping through the album years later. An album where every spread feels roughly the same, four photos, white border, repeat, starts to feel numbing after ten pages. An album that breathes, that has a quiet spread followed by something bold, keeps you turning pages because you genuinely do not know what comes next.
The couples I have seen rush this process often tell me the same thing: they wish they had taken another week. Not because the album is bad, but because they can see the decisions they made under pressure. The slightly-too-tight crop they did not notice until print. The section of the reception that got three pages when it deserved six.
The emotional payoff of a well-curated wedding album is not something you can replicate with a digital gallery on a laptop. Embrace the imperfections too. The slightly blurry photo of your grandmother laughing. The candid where someone’s mouth is open mid-sentence. Those are often the images that make you cry ten years from now.
— Ever
Start with photographs worth printing
[
Every step in this guide becomes easier when you begin with photographs that are already edited, beautifully exposed, and composed with an album in mind. At Weddingfilmphotography, we shoot in a documentary style that captures the quiet moments, the full-venue wide shots, and the intimate details that give an album its emotional range. Our couples receive high-resolution files delivered with album creation in mind, so nothing is missing when you sit down to design.
If you are planning your wedding in the Midlands, you can explore our Staffordshire wedding photography or our services covering Derbyshire couples and Worcestershire weddings. Get in touch and we will talk through exactly what you need for the album you have been picturing.
FAQ
How many photos should a wedding album include?
Most wedding albums work best with 60 to 120 images across 20 to 40 pages. Going beyond 120 photos tends to dilute the storytelling rather than strengthen it.
What is the best order for a wedding album?
Organise your album starting with getting ready and finishing with the send-off. This chronological flow creates a natural emotional arc that mirrors how the day actually felt.
How long does it take to receive a printed wedding album?
Production and delivery typically takes 5 to 10 business days. Factor in additional time for proofing and any revisions before placing your final order.
What paper and binding should I choose for a wedding album?
Lustre or matte paper resists fingerprints and reproduces skin tones well. Lay-flat binding is ideal for panoramic spreads because there is no gutter crease breaking up a wide image across two pages.
Can I create a wedding album myself without design experience?
Yes. Tools like Canva offer photo book templates suited to beginners, and AI-powered platforms can generate a draft layout from your photos in under a minute, giving you a starting point to customise rather than a blank canvas to fill.
Recommended
Comments