
3 Photographer Fixes to Improve Reception Lighting for Couples' Photos

The most reliable way to get flattering reception photos is warm, layered, directional lighting: kill the harsh overheads, bring in uplighting and pin-spots, add candlelight at table height, and walk the venue with your photographer before the day. One switch matters more than any other decision you’ll make about décor. If the overhead fluorescents stay on full blast, no amount of flowers will save your gallery.
TL;DR:
Confirm who controls the venue’s dimmers and whether they can be adjusted during the reception, as fixed overhead lighting often ruins photos if not managed properly.
Request warm white bulbs in the 2200K-3000K range and plan to turn off or dim harsh overhead fluorescents during meal and speech times to prevent flat, color-cast shots.
Incorporate uplighting and pin-spots early in planning since they deliver the most visual impact and help create a professional, magazine-style aesthetic in photos.
Conduct at least two lighting tests: one during initial planning at night and another during your rehearsal to ensure the room’s lighting setup accommodates optimal photography.
Use LED candles and work with professional lighting suppliers for rigging to avoid electrical hazards, shadow issues, and unflattering mixed lighting effects.
Table of Contents
Reception lighting for photos: the questions to ask your venue
How uplights, pin-spots, candles and dimmers change your photos
How do you coordinate lighting with your photographer and venue?
Solving the mixed-lighting, shadow, and backlighting problems
How Weddingfilmphotography helps you get reception lighting right
Reception lighting for photos: the questions to ask your venue
Most lighting disasters trace back to one thing: nobody asked who controls the switches until the week of the wedding. Sort this early and everything else gets easier.
Here’s what to confirm, roughly in the order it matters:
Who controls the dimmers, and can they be adjusted during the reception? Some venues lock overhead lighting to a fixed setting or require staff to operate it. Get this in writing.
Will the venue turn off or dim harsh overheads during the meal and speeches? Fluorescent overheads cast a greenish, flat tone that’s genuinely difficult to correct afterwards, so this is the single biggest lever you have.
What colour temperature are the decorative bulbs? Ask for warm white in the 2200K to 3000K range rather than cool white or daylight bulbs, which read as clinical and greyish on camera.
Can uplighting and pin-spots be added, and where? Uplights against the walls change the entire colour of a room in wide shots; pin-spots over the top table, cake, and centrepieces give you the editorial, magazine-style detail shots couples usually want.
Is a night-time walkthrough possible before you book, or at least before the final month? Daytime viewings tell you almost nothing about how a room photographs after dark.
What’s the open-flame policy? Some venues ban real candles outright, in which case flameless LED candles are the workaround.
What’s the budget for lighting hire, and what gives the best return? A modest uplighting package paired with one statement fixture, a chandelier, a lit dance floor, a dramatic drape, tends to outperform scattering the same money across lots of small extras.
Pro Tip: Ask your photographer to join the night-time walkthrough if they’re free. They’ll spot problems, like a spotlight that’ll blow out the head table or a dead corner with no light at all, that a venue coordinator won’t think to flag.
Budget-wise, couples typically find uplighting delivers the strongest visual return per pound spent of any single lighting item, which is why it sits at the top of most photographers’ recommendations rather than an afterthought.
How uplights, pin-spots, candles and dimmers change your photos
Every lighting element on this list does a different job, and knowing which is which stops you overspending on the wrong thing.
Uplighting (LED wall washes) floods walls and architectural features with colour, usually warm amber or a shade matched to your palette. In wide-angle reception shots, this is what stops a plain function room looking like, well, a plain function room. It’s the fastest way to change a space’s entire mood in camera.
Pin-spot lighting is a tight, focused beam aimed at one object, usually the cake, the centrepieces, or the top table. Directional, focused light like this creates the depth and editorial feel you see in the detail shots professional galleries are built around.
String or fairy lights and hanging fixtures add texture overhead, which matters because a flat white ceiling gives photographers nothing to work with in wider shots. They also double as a natural anchor point for first-dance photos.
Candles and LED candle alternatives put warmth right at table height, exactly where guests’ faces are. This is often the difference between a table shot that glows and one that looks administratively lit.
Warm bulbs in the 2200K to 3000K range flatter skin tones and make florals read richer and more saturated, a range specifically recommended for this reason rather than the cooler daylight bulbs many venues default to.
A useful rule of thumb from professional lighting design: the dance floor should read brighter than dinner, but not so bright guests feel watched, with a warm spotlight kept on the couple and everything else pulled down for drama.
On DIY versus hiring a specialist: fairy lights and battery candles are safe territory for a couple to sort themselves. Uplighting rigs, pin-spot positioning, and anything involving rigging above head height are worth handing to a professional lighting supplier, both for safety and because getting the throw and colour wrong is expensive to fix on the day. For more on how these choices play out in practice, our guide to how lighting shapes wedding photos walks through real examples.
How do you coordinate lighting with your photographer and venue?
The walkthrough is where problems get caught cheaply, before they’re baked into a contract. Bring your venue coordinator, your lighting supplier if you’ve hired one, and your photographer if they’re available, and test the room after dark, not during a daytime tour.
At that walkthrough, check for:
Whether the dimmers actually work as promised, and who has access to them on the night
Any colour cast from fixed fittings that clashes with your décor or skin tones
Shadows cast by pillars, beams, or hanging décor across the head table and dance floor
Rigging points for uplights or pin-spots, and whether the venue allows temporary fixtures
Agree simple lighting cues in advance: who dims the room for speeches, who cues the spotlight for the first dance. Confirm in the contract who has dimmer access, what rigging is permitted, and the venue’s stance on open flame.
Pro Tip: Keep a couple of battery LED candles or a warm table lamp in your emergency kit. If a bulb blows or a dimmer fails mid-reception, you’ve got a backup that won’t leave a table looking flat in photos.
When to test lighting and what it costs
Visit the venue at night while you’re still planning, not the week before. Book a second check during your run-through or rehearsal, once the room is closer to how it’ll look on the day, and confirm your lighting supplier’s set-up window lines up with when your photographer arrives to check the room.
On budget: a common guideline is 8 to 15% of your overall décor spend going towards lighting, with uplighting plus one statement fixture giving the strongest visual payoff for the money. A typical uplighting package for a mid-sized reception room runs into a few hundred pounds rather than thousands, which is modest against what most couples spend on florals.
Night-time venue visit: during initial planning
Second lighting check: at rehearsal or final run-through
Supplier set-up and photographer check-in: agreed the week of the wedding
Complex rigging: leave to a licensed lighting professional, not a well-meaning relative
Choosing the right equipment for reception photography
Couples often assume the photographer brings everything needed and the venue’s own lighting is irrelevant. It isn’t. LED panels and battery-powered pin-spots are what most professional lighting suppliers now use over old-style halogen fixtures, because they run cooler, last longer through a six-hour reception, and let you dial in warm colour temperatures precisely rather than guessing.
Softboxes and diffusers matter less for ambient reception lighting than for portraits, but a supplier may still use a small diffused panel near the top table to soften a pin-spot that would otherwise throw a harsh shadow across the bride and groom’s faces. Reflectors, meanwhile, are more a photographer’s tool than a venue one: a compact bounce reflector can redirect existing warm light onto a couple’s faces during speeches without adding another fixture into the room at all.

For couples and planners, the practical decision isn’t which brand of panel to buy. It’s whether your lighting supplier’s equipment can hit a warm colour temperature, dim smoothly rather than in awkward steps, and be positioned without trailing cables across a dance floor. Ask to see the kit list before booking, not after.
Solving the mixed-lighting, shadow, and backlighting problems
Mixed lighting, where fairy lights, overhead fittings, candles, and a photographer’s flash are all firing at once at different colour temperatures, is the single most common cause of odd-looking skin tones in reception galleries. Fixed venue fittings running cool white while your décor lighting runs warm creates a visible colour clash that’s hard to correct after the fact.
The fix starts with reducing the number of competing sources rather than adding more. Dimming or switching off fixed overheads removes the worst offender immediately. Where a venue can’t remove a fitting, ask whether it can be gelled to a warmer tone.
Shadows usually come from a single overhead spotlight positioned directly above a table or the head table, which throws harsh shadows under eyes and noses. Pin-spots angled at roughly 45 degrees avoid this far better than anything pointed straight down.
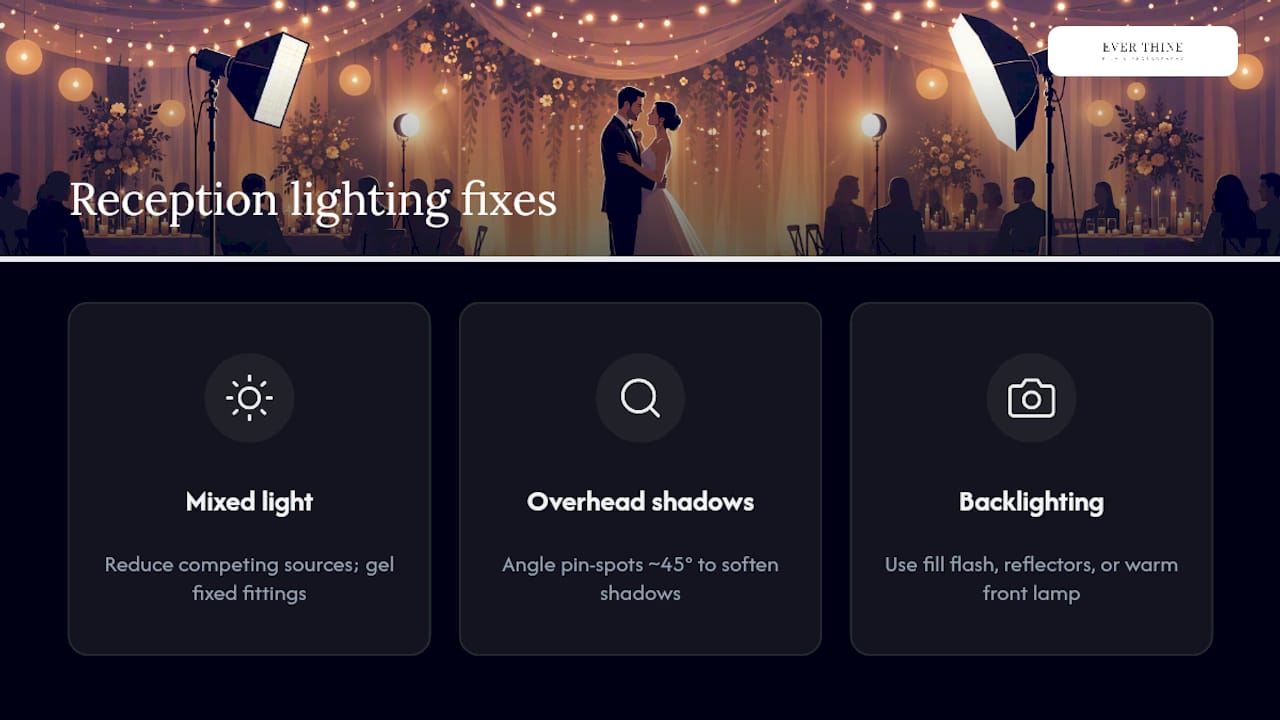
Backlighting, large windows or glass doors behind the top table during golden hour, looks stunning to the eye but can leave faces underexposed in photos unless it’s balanced with light from the front. Professional photographers handle this with fill flash and reflectors, techniques rooted in studio three-point lighting adapted for reception settings, but couples can help simply by placing a warm uplight or lamp facing the table from the front to counter a bright window behind it.
Balancing daylight with your reception lighting
Early receptions held in rooms with large windows create a different challenge: too much natural light rather than too little. Daylight is cooler and bluer than most warm artificial sources, and the two clashing in one frame is what produces that slightly odd, two-toned look in some wedding galleries.
If your reception starts in daylight, keep artificial warm lighting low and let natural light do most of the work until the sun drops, then bring uplights and pin-spots up gradually as the room dims. Trying to run both at full strength simultaneously usually looks worse than favouring one.
As dusk approaches, that’s the window photographers call golden hour, and it’s worth timing key portraits, first dance shots, sunset couple portraits, around it deliberately rather than leaving them to chance. A night-time walkthrough during planning shows you exactly how the room transitions from daylight to artificial light, which is the only way to plan this transition properly rather than guessing.
Curtains and blinds matter more than most couples expect. A room that looks lovely with natural light streaming in at 2pm can turn into a glare problem by 6pm as the sun drops lower and hits guests directly in the eyes. Ask whether blackout blinds are available and who’s responsible for closing them.
Electrical safety for reception lighting
Uplights, pin-spots, and string lights all draw power from somewhere, and that somewhere needs to be planned, not improvised with extension leads trailing across a dance floor. Any electrical lighting hire should come from a supplier who can confirm their equipment is PAT tested and that their rigging meets the venue’s own electrical and fire safety requirements.
Trailing cables are a genuine trip hazard once a room fills with guests and staff carrying trays, so cables should be run along walls or taped down, never left loose across a walkway. Battery-powered LED candles solve the open-flame question outright for venues that ban real candles, and they’ve become good enough visually that most guests won’t notice the difference in photos.
Rigging pin-spots or uplights above head height, on trussing, from a ceiling, or clipped to existing venue fixtures, should be left to a professional lighting supplier who carries the right insurance and knows the load limits of what they’re attaching to. This isn’t the place to save money with a DIY approach.
Confirm with your venue in writing whether outside lighting suppliers are permitted to bring their own equipment, and whether the venue’s own electrics can handle the additional load without tripping a circuit mid-speech. It happens more often than couples expect, usually because nobody checked the fuse board capacity beforehand.
A photographer’s take on reception lighting
We’ve walked into reception rooms where the overheads alone would have ruined every table shot, and a five-minute conversation with the venue fixed it. The recurring problems are always the same: fluorescent overheads nobody thought to dim, a single spotlight blasting the top table from directly above, and glass doors turning golden hour into a silhouette.
Our three non-negotiables when we visit a venue: who controls the dimmers, what colour temperature the bulbs are, and whether pin-spots can go over the cake and centrepieces. Get those three right and the room does most of the work for us.
— Dawn & Carl
How Weddingfilmphotography helps you get reception lighting right
Weddingfilmphotography treats reception lighting as part of the photography plan itself, not an afterthought sorted the week before. Where a venue coordinator can only advise on what their room technically allows, Dawn & Carl join the night-time walkthrough, test how the dimmers, overheads, and any hired uplighting actually photograph, and flag problems while there’s still time to fix them.
[
That’s the practical difference: documentary-style coverage built around a room you’ve already tested together, rather than a photographer arriving on the day to work around whatever lighting happens to be switched on. If you’re planning a reception in Staffordshire, the West Midlands, or beyond, get in touch to arrange a lighting walkthrough alongside your booking enquiry. Start with our Staffordshire wedding photography page or, for couples further south, our Worcestershire booking page, and ask us to talk lighting before you sign anything with your venue.
Sources
FAQ
What’s the best colour temperature for reception lighting?
Aim for warm white bulbs in the 2200K to 3000K range, which flatters skin tones and makes florals read richer than the cooler daylight bulbs many venues install by default.
Should overhead lights be off during the reception?
Yes, or at least heavily dimmed. Fluorescent overheads create a flat, greenish cast that’s genuinely hard to fix in photo editing afterwards.
Do we need real candles, or will LED candles work in photos?
LED candles photograph convincingly at table height and solve the problem outright for venues with open-flame restrictions, so they’re a reliable substitute where real candles aren’t allowed.
When should we test the venue’s lighting?
Visit at night during initial planning, then check again at your rehearsal or run-through once the room is set up closer to how it will look on the day.
Recommended


Comments