
The role of lighting in photos: a beginner's guide
- 7 hours ago
- 8 min read
TL;DR:
Lighting is essential for creating mood, depth, and texture in photography before any camera settings are adjusted.
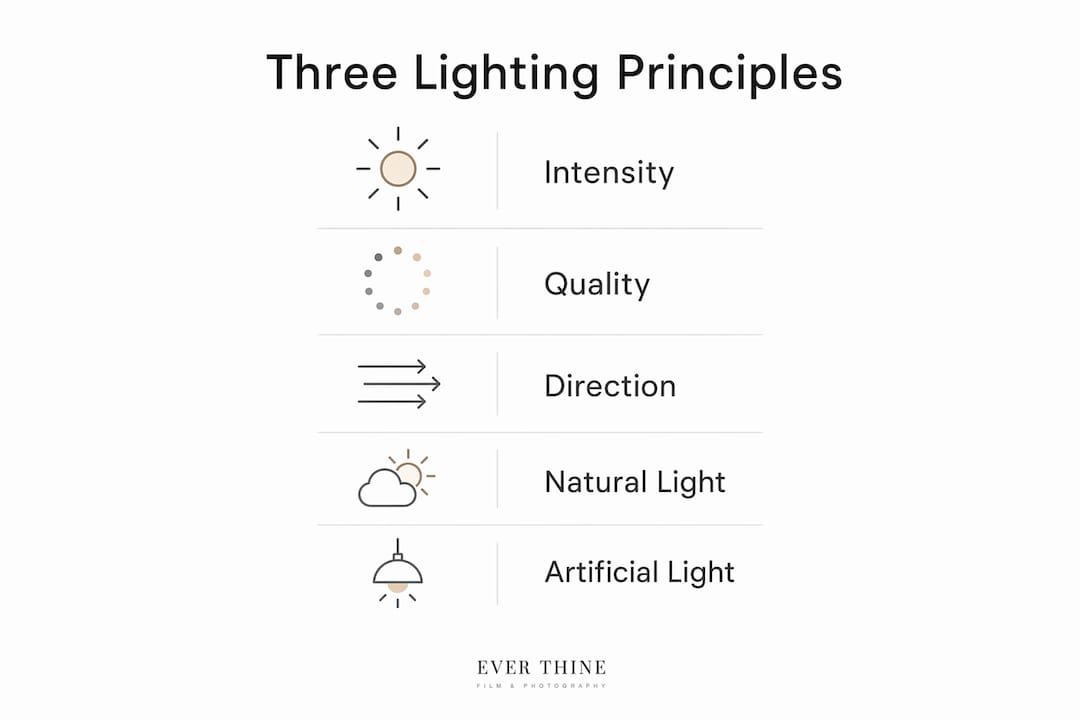
Understanding the principles of intensity, quality, and direction allows photographers to control their images regardless of conditions.
Lighting is the primary determinant of image quality in photography, shaping mood, texture, depth, and colour before a single camera setting is touched. Whether you shoot on a smartphone or a full-frame DSLR, the light around your subject decides whether your photo feels flat or alive. The role of lighting in photos goes far beyond simple illumination. It is the difference between a snapshot and a photograph worth keeping. Understanding the three core principles of light, intensity, quality, and direction, gives you a framework that applies to every situation, from a sun-drenched garden to a dimly lit reception hall.
What is the role of lighting in photos?
Light is a photographer’s most powerful tool for storytelling and mood creation, not just illumination. A portrait taken in warm, golden afternoon light feels intimate and welcoming. The same face photographed under a cold, overhead fluorescent strip looks clinical and flat. The light has not changed the subject. It has changed everything the viewer feels about the subject.

Intensity, quality, and direction are the three fundamental pillars that dictate every photograph’s mood, dimension, and colour. Intensity refers to brightness and directly affects exposure. Quality describes whether light is soft or hard, which depends on the size of the light source relative to the subject. Direction controls where shadows fall, and shadows are what give a photo its sense of shape and depth.
Principle | What it means | Photographic effect |
Intensity | Brightness of the light source | Controls exposure and overall image feel |
Quality | Soft vs. hard light based on source size | Determines shadow harshness and skin texture |
Direction | Angle of light relative to subject | Shapes depth, mood, and facial definition |
Pro Tip: Before adjusting any camera setting, look at where the light is coming from and what it is doing to your subject’s face. That observation is worth more than any technical tweak.
How does natural light vary and how can photographers use it effectively?
Natural light is not a fixed resource. It changes by the hour, the season, and the weather, and each variation produces a different photographic result. Learning to read those changes is one of the most transferable skills in photography.
The golden hour, the period roughly one hour after sunrise and one hour before sunset, produces warm, low-angled light that wraps around subjects softly. Shadows are long and gentle. Skin tones glow. This is why portrait photographers and wedding photographers consistently plan shoots around these windows. For guidance on making the most of this light, the Weddingfilmphotography guide on natural light photography covers golden hour positioning in practical detail.
Midday sun is the most challenging natural light condition. The sun sits directly overhead, creating short, harsh shadows under eyes, noses, and chins. Skin loses its warmth and highlights blow out quickly. The solution is not to pack up and go home.
Here is how to work with natural light at any time of day:
Seek open shade. Move your subject under a tree canopy, a building overhang, or a covered walkway. Open shade techniques reduce harsh midday shadows and blown highlights without any equipment.
Face the open sky. Shade alone is not enough. Position your subject so they face the brightest open area of sky. Mere shade without this positioning produces flat, dull skin tones.
Use overcast days deliberately. Clouds act as a giant natural diffuser, spreading light evenly across a scene. Overcast conditions are ideal for portraits because shadows are minimal and colour is consistent.
Reflect available light. A white wall, a light-coloured pavement, or even a white sheet of card can bounce light back onto a subject’s face, filling in shadows without any specialist gear.
Watch the weather. Mastering light is more about choosing when and where to shoot than controlling the light itself. Successful photographers plan around conditions rather than fighting them.
Pro Tip: On a bright day, turn your subject away from the sun so it acts as a rim light behind them, then use a reflector or a white wall to bounce soft fill light onto their face from the front. The result looks studio-quality with zero equipment.
Colour temperature is another variable most beginners overlook. Warm light colours, the reds, oranges, and yellows of golden hour, evoke inviting and emotional moods. Cool hues, the blues and greens of overcast midday or open shade, create distance or a sense of calm melancholy. Adjusting your white balance in-camera or in post-processing lets you control how much of that colour temperature appears in the final image.
What role does artificial lighting play for beginners?
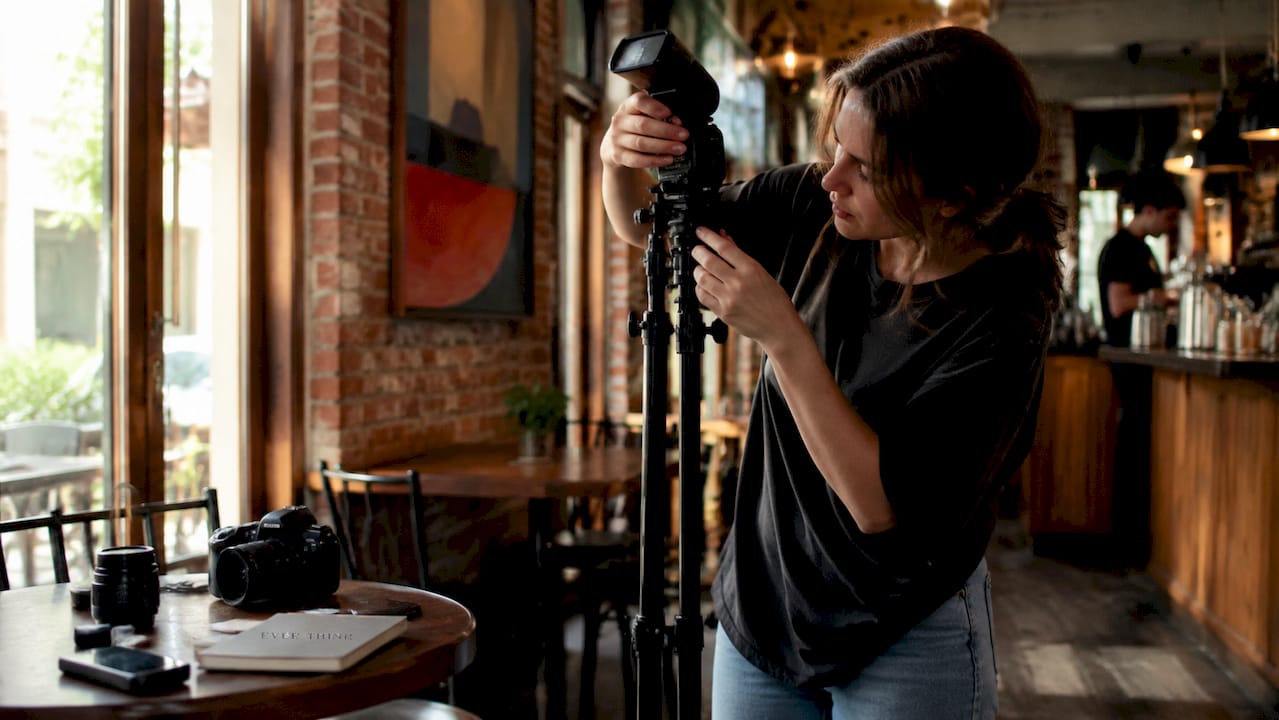
Artificial light gives photographers control that natural light cannot. You decide the intensity, the direction, and the quality, regardless of the time of day or the weather outside.
The most common artificial light sources beginners encounter are:
Continuous lights. These stay on permanently, making it easy to see exactly how light falls on a subject before you shoot. LED panels are the most accessible entry point.
Studio strobes. These flash at the moment of exposure and produce a large burst of light. They require a trigger and some practice, but they offer significant power and consistency.
On-camera flash. Built-in or hotshoe-mounted flash is portable and immediate. Direct on-camera flash is harsh, but bouncing it off a ceiling or wall softens the result considerably.
Reflectors and diffusers are the most accessible tools for shaping any light source. A reflector bounces light back onto a subject to fill shadows. A diffuser, placed between the light source and the subject, spreads and softens the beam. Both tools work with natural and artificial sources.
Matching artificial light to natural light is a common challenge. When shooting indoors near a window, the natural light is often cooler than a warm tungsten bulb. Setting your white balance manually or using a daylight-balanced LED panel solves the mismatch. Consistent colour across a scene reads as professional, even when the viewer cannot explain why.
A simple two-light portrait setup works well for beginners. Place one light at a 45-degree angle to the subject’s face as the main source, then use a reflector or a second, dimmer light on the opposite side to reduce shadow depth. This setup creates dimension without complexity.
How does lighting direction shape portrait photography?
Direction is the most expressive of the three lighting principles, particularly in portraits. Where light comes from relative to a face determines whether a person looks sculpted, dramatic, flat, or unsettling.
Key directional approaches for portraits:
Side lighting at 45 degrees. Side lighting at a 45-degree angle provides the most flattering, natural-looking shadows that define facial features. It creates sculptural depth and enhances texture without making the face look harsh.
Backlighting. Placing the light source behind the subject creates a rim of light around the hair and shoulders, separating the subject from the background. It adds drama and works beautifully for silhouettes or romantic portraits.
Front lighting. Light directly in front of the subject reduces shadows and is forgiving for skin texture. It can feel flat, but it works well for bright, clean editorial portraits.
Overhead and underlighting. Direct overhead lighting causes unflattering shadows under eyes, noses, and chins, often called “raccoon eyes.” Lighting from below creates an eerie, unnatural effect. Both are worth avoiding in most portrait situations.
Catchlights are a detail that separates polished portraits from amateur ones. Catchlights in a subject’s eyes add life and sparkle, preventing dull or lifeless-looking eyes regardless of other lighting conditions. Position your subject so a window, the open sky, or a light source reflects as a small highlight in each pupil. The effect is subtle but transforms the emotional connection between the viewer and the portrait.
Pro Tip: When shooting portraits indoors, position your subject side-on to a large window. The window acts as a giant soft box, the catchlight appears naturally in the eye nearest the window, and the shadow side of the face gives you depth without any additional equipment. This is the technique behind many of the most celebrated portrait photographs in fine art photography.
The unnatural lighting angles that produce unflattering portraits arise from what photographers sometimes call the “uncanny valley” of light. Lighting near eye level or from a slight side angle consistently produces the most lifelike and pleasing results. The further you deviate from that zone, the more unsettling the result becomes.
Key takeaways
Light shapes every photograph’s mood, depth, and quality, and understanding intensity, quality, and direction gives photographers control over results that no camera upgrade can replicate.
Point | Details |
Three core principles | Intensity, quality, and direction govern every lighting decision in photography. |
Natural light is variable | Golden hour, overcast skies, and open shade each produce distinct and usable results. |
Open shade technique | Position subjects facing open sky in shade to achieve soft, flattering light without gear. |
Direction defines portraits | Side lighting at 45 degrees is the most flattering angle for facial definition and depth. |
Catchlights matter | Reflections of light in the eyes add life to portraits and should be sought deliberately. |
Why I think most beginners get lighting completely backwards
Most photographers starting out spend months researching camera bodies and lenses, then shoot in whatever light happens to be available. The result is technically correct images that feel lifeless. The gear obsession is understandable. Equipment is tangible and measurable. Light feels abstract until you start paying attention to it.
A smartphone photo in good natural light can outperform a professional camera in poor light. That fact should reframe every purchasing decision a beginner makes. The camera records light. It does not create it. Spending time learning to observe light, how it moves through a space, where it pools, where it hardens, is the single most productive thing a photographer can do.
Viewing light as a variable to manipulate rather than a fixed constraint is what separates photographers who grow quickly from those who plateau. The best light conditions are often inconvenient. Golden hour means early mornings and late evenings. Overcast days mean rescheduling. But photographers who build their habits around chasing good light produce consistently better work than those who shoot whenever it is convenient.
The Weddingfilmphotography guide on how lighting shapes wedding photos captures this well. Observational skill, knowing when to move a subject two metres to the left or wait ten minutes for the sun to drop, is what creates memorable images. That skill takes time to build, but it costs nothing to start developing today.
— Ever
How Weddingfilmphotography uses light to tell your story
At Weddingfilmphotography, light is not an afterthought. Every image and film we create is built around reading and working with the available light, whether that is the soft glow of a church window, the golden warmth of a late afternoon garden, or the drama of a candlelit reception.
[
We work across Derbyshire, Staffordshire, and Worcestershire, and every venue presents a different lighting challenge that we plan for in advance. If you want photography that captures genuine emotion and atmosphere rather than posed snapshots, our wedding photography in Staffordshire and Derbyshire wedding photography services are built on exactly the principles covered in this guide. Get in touch to see how we approach your venue and your light.
FAQ
What are the three principles of lighting in photography?
The three principles are intensity, quality, and direction. Intensity controls brightness and exposure, quality determines whether light is soft or hard, and direction shapes shadows and depth.
What is the best natural light for portrait photography?
Golden hour light, roughly one hour after sunrise or before sunset, produces warm, low-angled, soft light that is the most flattering for portraits. Overcast conditions are a close second, as clouds diffuse light evenly across the face.
How do I avoid harsh shadows in midday sun?
Move your subject into open shade under a tree or building overhang, then position them to face the brightest open area of sky. This produces soft, studio-like light without any equipment.
What are catchlights and why do they matter?
Catchlights are small reflections of a light source visible in a subject’s eyes. They add life and sparkle to portraits, making eyes appear lively rather than flat or dull.
Does lighting matter more than camera quality?
Lighting has a greater impact on the final image than camera quality in most situations. A well-lit photo taken on a smartphone will outperform a poorly lit photo taken on professional equipment.
Recommended

Comments