
Step by step wedding album creation: a complete guide
- 1 day ago
- 8 min read
TL;DR:
Creating a wedding album involves selecting, organizing, and designing photos into a visual story that preserves the wedding day. Couples should ruthlessly edit their gallery to focus on meaningful moments and use design principles like spreads, negative space, and size variation to enhance emotional impact. Starting the album process within six months of the wedding and consolidating feedback helps ensure a finished, impactful keepsake.
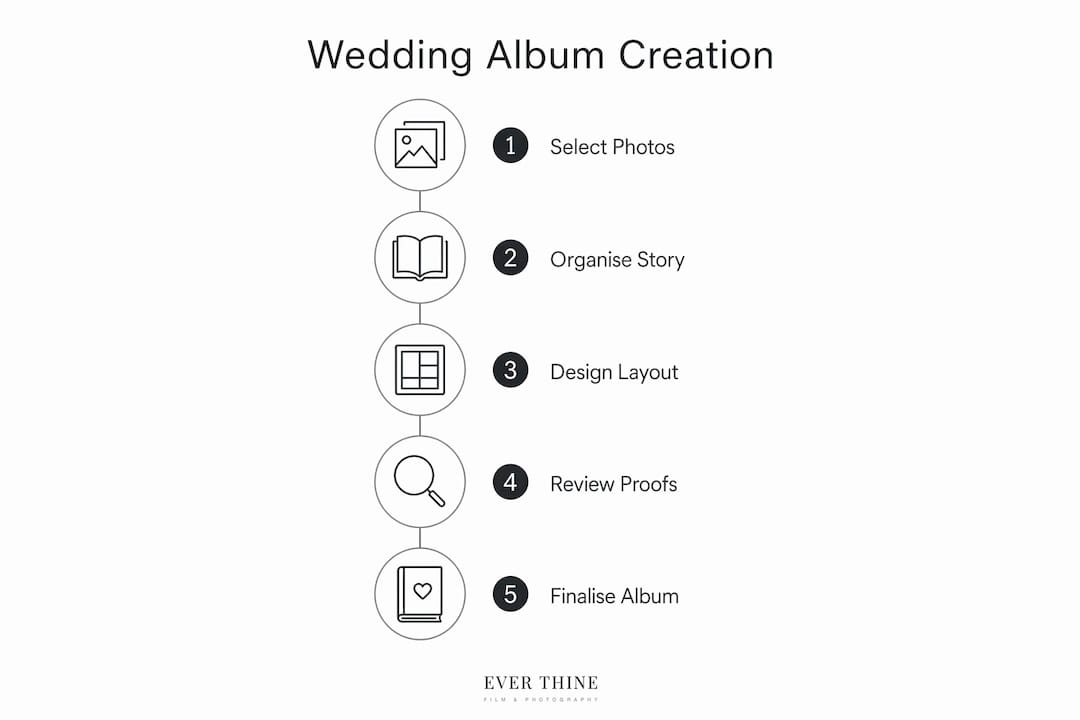
Wedding album creation is the systematic process of selecting, organising, and designing your photographs into a visual narrative that preserves your wedding day authentically. Unlike a simple photo backup, a well-crafted album functions as memory architecture, where every spread tells part of your story. Professional standards typically call for 120–150 photos across 60 pages, selecting roughly 2–3 images per page from an original gallery of 400–1,200 shots. That level of curation is what separates a meaningful keepsake from a cluttered scrapbook. This guide walks you through every stage of the process, from gathering your images to approving your final proof.
What are the essential photos and tools needed to start?
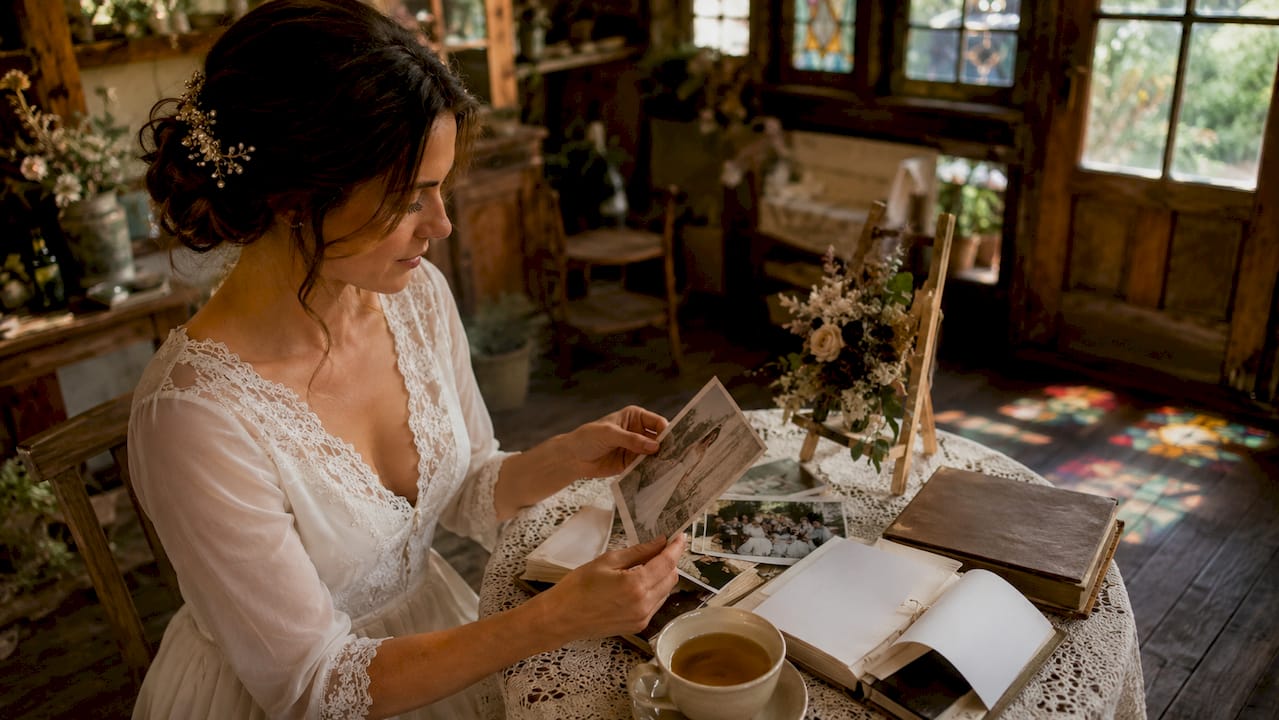
Your photographer will typically deliver a gallery of 400–1,200 images. That number reflects every usable moment captured across your day, not every image you need in your album. Your first task is narrowing that gallery down to a working shortlist of 100–200 images before any design work begins.
Start by sorting photos by moment or theme to reduce the feeling of being overwhelmed. Practical categories include:
Getting ready — hair, make-up, dressing, and quiet emotional moments with family
Ceremony — processional, vows, ring exchange, first kiss, and signing the register
Portraits — couple shots, wedding party, and family formals
Reception — speeches, first dance, cake cutting, and candid guest moments
Details — florals, stationery, venue décor, and table settings
These categories give you a clear framework before you open any design tool. Once you have your shortlist, you need a way to lay it out. Professional photographers often use dedicated album design software, but couples working on a wedding album DIY guide approach can use browser-based album builders offered by print labs. Many professional print labs provide free design tools tied directly to their ordering system, which removes the guesswork around print sizing and bleed areas.
Pro Tip: Flag your absolute favourite images with a star rating before you start culling. This creates a non-negotiable core of 20–30 hero shots that anchor the album, and everything else fills around them.

How do you select and organise photos to tell your wedding story?
Photo selection is where most couples stall. The gallery feels precious, and cutting images feels like erasing memories. The truth is the opposite: ruthless photo editing focusing on meaningful moments converts a large image set into an elegant, impactful album. Keeping too many similar shots dilutes the emotional power of each one.
Follow this numbered sequence to move from a full gallery to a curated story:
Do a first pass for technical quality. Remove any image that is blurry, poorly exposed, or has an unflattering expression. Be decisive. A technically weak photo does not improve in print.
Eliminate near-duplicates. Your photographer likely shot bursts during key moments. Choose the single strongest frame from each burst. Two near-identical images side by side weaken both.
Apply the emotional impact test. Ask yourself whether the image makes you feel something. If the answer is neutral, it does not belong in the album.
Check for variety. A strong album mixes wide establishing shots, close-up details, candid moments, and posed portraits. If you have five consecutive candid reception shots, swap two for detail or portrait images.
Sequence for narrative flow. Arrange your shortlist in chronological order and read through it like a film. The story should build from anticipation in the morning, peak at the ceremony, and settle into warmth and celebration by the reception.
Pro Tip: Print your shortlist as a contact sheet, or lay thumbnail images across a table. Seeing all images at once reveals repetition and gaps far more clearly than scrolling through a screen.
Mixing image types is not just an aesthetic choice. Approaching album creation as crafting a visual story with emotional peaks ensures the album engages viewers on every page rather than feeling like a flat record of events.
What design principles make a wedding album visually compelling?
Design is where your curated images become a finished album. Most couples underestimate how much layout decisions affect the emotional impact of the final product. A few core principles separate a professional-quality result from a home-printed photo book.
Design for two-page spreads, not single pages
Designing for two-page spreads rather than individual pages prevents important content from being lost in the binding. The central gutter, where the two pages meet, is a dead zone. Never place a face, a key expression, or a critical detail across the gutter. A first kiss split down the middle by the spine is a design failure that cannot be corrected after printing.
Balance photo density with negative space
Successful wedding albums balance photo density with a 2:1 ratio of negative space for visual rhythm. That means for every two areas of image, one area of the spread should breathe. Cramming eight photos onto a single spread may feel like value, but it reads as chaos. A single full-bleed image of your ceremony venue, given an entire spread, carries more emotional weight than a grid of six smaller shots.
Use size variation to signal importance
Your most emotional moments deserve the most space. A full-bleed double-page spread of your first dance tells the viewer this moment mattered. A small inset of a table centrepiece tells them it was a supporting detail. Size is your primary tool for guiding the viewer’s emotional attention through the album.
Maintain tonal consistency
Maintaining tonal consistency across images avoids jarring visual clashes that disrupt the emotional narrative. Group images by lighting and colour palette where possible. A warm golden-hour portrait placed next to a cool blue flash-lit reception shot creates a visual jolt that pulls the viewer out of the story. Your photographer’s editing style should already provide a consistent baseline, but watch for exceptions when mixing indoor and outdoor images.
Pro Tip: Alternate full-bleed spreads with multi-photo grid pages throughout the album. This rhythm prevents visual fatigue and gives each full-bleed image greater impact by contrast.
A common design mistake is treating every page with equal weight. Not every moment of your wedding day carries the same emotional significance, and your album layout should reflect that honestly.
How do you review proofs and finalise your wedding album?
Proof review is the final quality gate before your album goes to print. Most couples approach it incorrectly by reviewing individual images in isolation rather than reading each spread as a complete unit. A photo that looks slightly dark on its own may read perfectly within the context of a moody, low-lit ceremony spread.
Follow these practices to make the proofing stage efficient and effective:
Review spreads, not pages. Open your proof document in two-page view and read it as you would a book. This is how the finished album will be experienced.
Consolidate all feedback into a single document. Sending organised, single-batch feedback rather than sporadic corrections maintains the album’s visual balance and prevents design discord. A stream of individual emails with one change each creates confusion and risks introducing errors.
Be specific about what you want changed. “Page 12, left image: please swap for the one where I am looking at the camera” is useful feedback. “Can we make it feel more romantic?” is not.
Limit revision rounds. Most professional album designers include one or two rounds of revisions. Use your first round for structural changes, such as swapping images or adjusting spreads. Use your second round for fine-tuning only.
Approve promptly once satisfied. Finished albums are typically dispatched within one to two weeks after proof approval. Delays in approval push back your delivery date by the same margin.
For a detailed walkthrough of the proofing process, the proof review guide from Weddingfilmphotography covers how to give feedback that protects the design intent of your album.
Key takeaways
A well-designed wedding album requires deliberate curation, consistent design principles, and structured feedback to preserve your wedding story with lasting impact.
Point | Details |
Curate ruthlessly | Select 120–150 images from your full gallery to keep the album focused and emotionally powerful. |
Organise by moment | Sort photos into categories like ceremony and reception before any layout work begins. |
Design for spreads | Always plan layouts as two-page spreads and keep faces away from the central gutter. |
Use negative space | A 2:1 ratio of image to breathing room creates visual rhythm and a professional feel. |
Consolidate feedback | Send all proof corrections in a single, organised document to avoid design errors and delays. |
Why I think most couples wait too long to start their album
The single most common regret I hear from couples is that they left the album too late. Starting album creation later than six months after the wedding significantly reduces the likelihood of ever finishing it. Life accelerates, the emotional urgency fades, and the gallery sits untouched on a hard drive. The album never gets made.
What surprises most people is that the hardest part is not the design. It is the decision-making. When you are six weeks out from your wedding, the memories are vivid and the choices feel clear. At eighteen months out, every image feels equally important because the emotional hierarchy has blurred. You end up keeping too many photos, the album becomes unwieldy, and the whole project stalls.
My honest advice is to treat the album as part of the wedding itself, not an afterthought. Book your photographer, discuss the album at your first meeting, and agree on a timeline before the day arrives. The best albums I have seen come from couples who approached the complete album process with the same intention they brought to choosing their venue or their flowers.
Design restraint is also harder than it sounds. Every couple wants to include more photos than the album needs. The discipline of removing a good image because a better one already covers that moment is what elevates a decent album into a great one. Trust the process, trust your photographer’s eye, and resist the urge to add just one more spread.
— Ever
How Weddingfilmphotography supports your album from day one
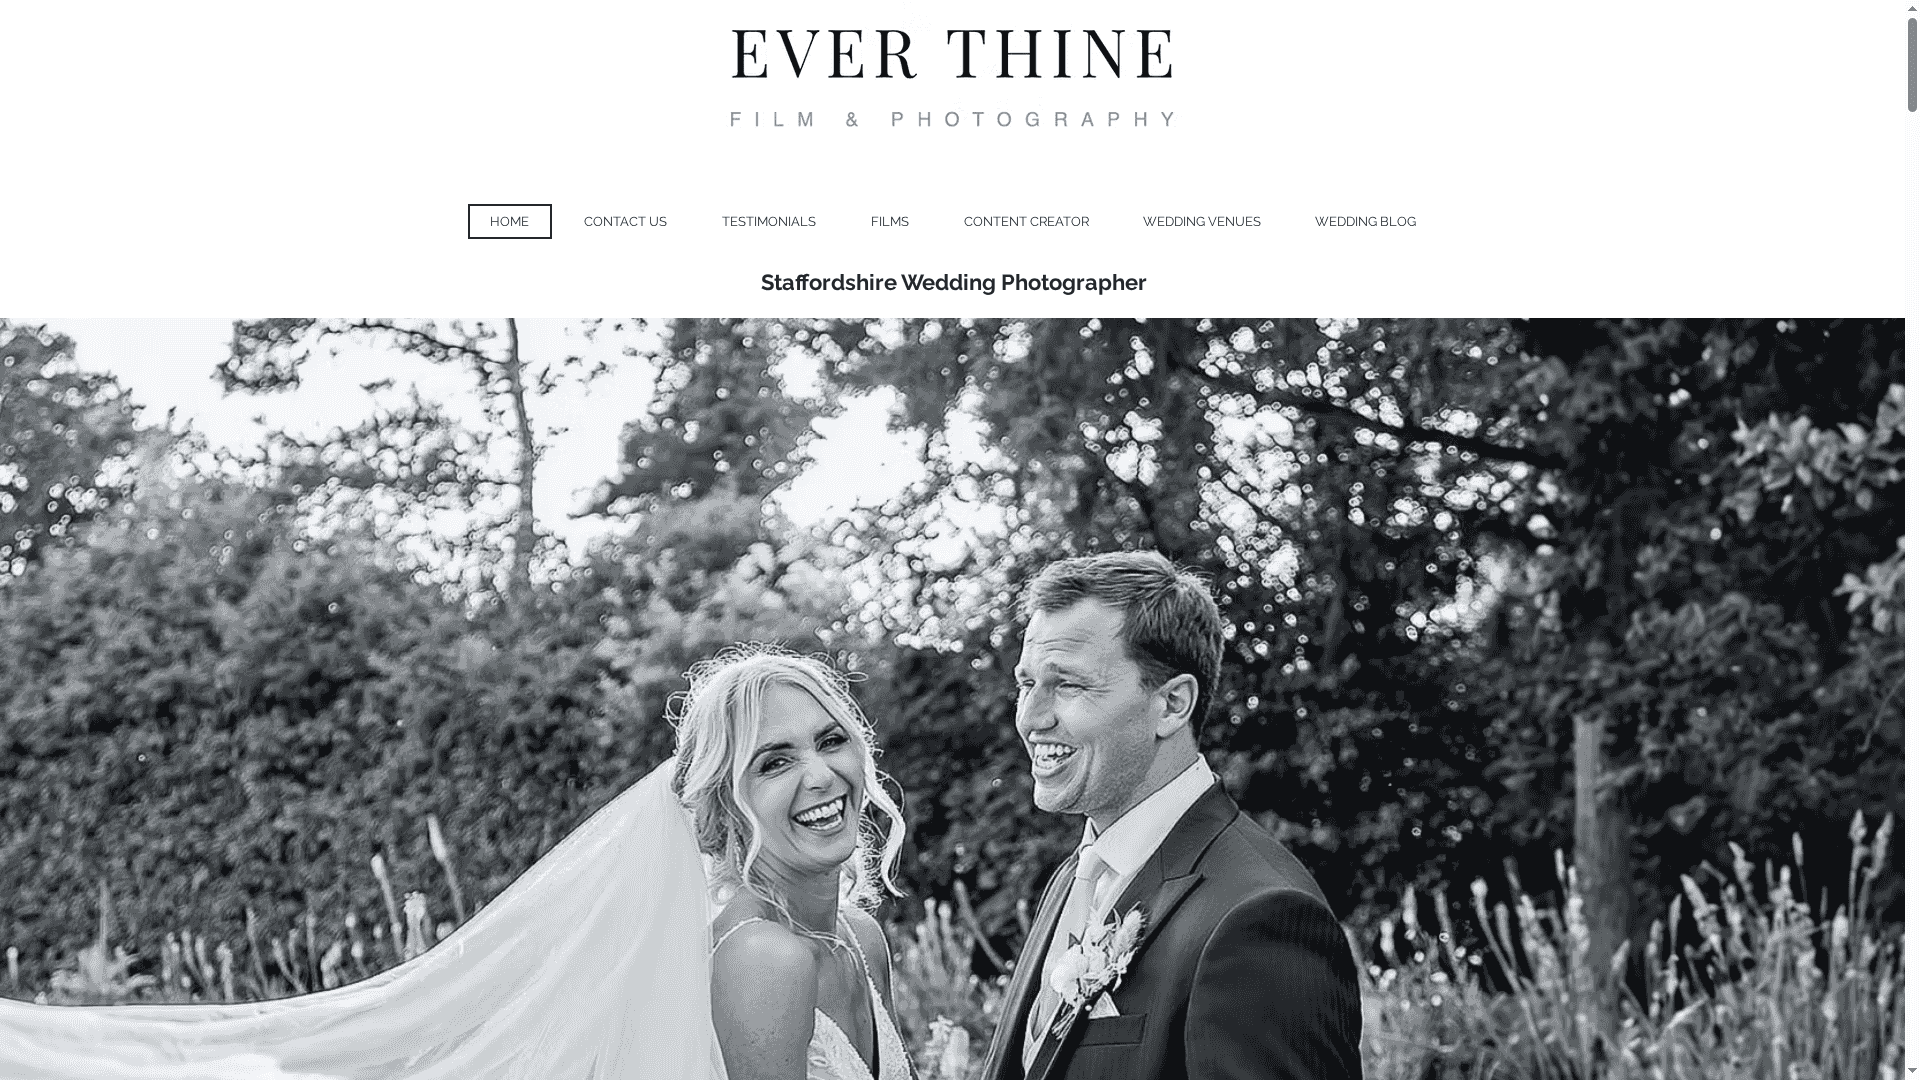
Weddingfilmphotography is a multi-award-winning photography and film studio based in Staffordshire, covering Derbyshire, Worcestershire, and beyond. Every package is built around documentary-style coverage that captures authentic, unposed moments, giving you the raw material a truly compelling album needs.
[
The team works with couples from the initial consultation through to the finished album, guiding image selection, layout, and print quality at every stage. If you are planning your wedding in the Midlands, the Derbyshire wedding photography and Staffordshire photography packages pages are the best place to start a conversation about your album. Get in touch to discuss how your story deserves to be told.
FAQ
How many photos should a wedding album contain?
A standard 60-page wedding album contains 120–150 photos, selecting roughly 2–3 images per page from a full gallery of 400–1,200 images.
When should I start creating my wedding album?
Start within six months of your wedding day. Beginning later significantly reduces the likelihood of completing the album, as emotional clarity fades and decision-making becomes harder.
What is the biggest design mistake couples make?
Placing faces or key expressions across the central gutter of a two-page spread is the most common and irreversible design error in printed wedding albums.
How do I give feedback on my album proof effectively?
Consolidate all corrections into a single, clearly organised document rather than sending changes in separate messages. This protects the visual balance of the design and prevents errors.
How long does it take to receive a finished wedding album?
Most professional album providers dispatch the finished album within one to two weeks of receiving final proof approval from the couple.
Recommended

Comments